Summer Nicoise Salad, My Version

Oh, sorry blog. I neglected you for the first half of 2013. Hi, readers! Do you remember me? If you know me well, and you haven’t  just stumbled across Oishii from a google search for “pork loin chops” (our most popular post), then you already know the two reasons behind this embarrassingly long hiatus. If not, welcome, and let me share our joy with you!

1. We’re expecting again! Levi is going to be a big brother in August and the gender is once again going to be a surprise. At almost 29 weeks I’m definitely far enough along that I can’t use morning sickness as an excuse for my lack of blogging, but taking care of a 3 year old definitely keeps me busy. In fact, sometimes I completely forget that I’m pregnant, until I look down and notice the absence of toes, or realize I’m craving a crisp, floral IPA but then remember that I can’t indulge just yet and reach for a sparkling water instead. Speaking of beer …

27 weeks on mothers day

2. Our family business, Discretion Brewing, opened its doors in early March after a year + of planning, and we’ve been as busy as bees selling beer (we have 7 now on tap!) and small plates to pair with it. Despite my growing belly and inability to drink beer, I’m enjoying working behind the bar as a Beer Bestower, as well acting as our Queen of Social Media for the business. Things are going really well, and we’ve been well-received by our town, even by other micro-breweries. The beer community is an awesome one. If you’re ever in Santa Cruz, we’d love to have you!

twitter header
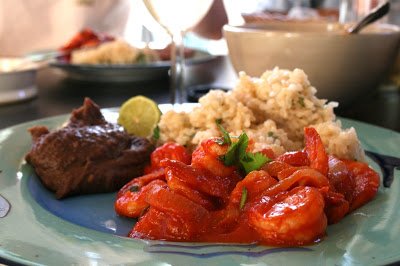
Now you can see why our dinners at home have been quick and easy these days — and also based around random pregnancy cravings, ranging from briny olives [this salad] to cinnamon rolls [breakfast for dinner]. I’ve also been terrible at photographing or writing anything down (and, as you know if you’ve been pregnant, when you’re hungry, you’re hungry. No time for pictures). But somehow this meal DID get photographed. I guess I made it early enough in the day that I had a few moments to spare, so I’ll share it with you. Summer is upon is (eek – better get that car seat purchased and decide on a name for this baby!) and this salad is perfect for a warm evening . It also boasts of seasonal farmer’s market faire.

Summer Nicoise Salad, My Version

nicoise salad
Nicoise Salad; the classic French salad is usually composed of tuna, green beans, hard-boiled eggs, tomatoes, and an anchovy dressing. This is my version.

Start with crisp romaine lettuce, wash, spin dry, tear into bite sized pieces, and pile onto your serving plates. Arrange the various components on top of the lettuce in whatever order pleases you: Quickly blanched farmer’s market green beans  (just 2-3 min in boiling water until bright green and still crisp, then plunge them into an ice bath to stop cooking), halved boiled new potatoes, halved cherry tomatoes, sliced farm-fresh radishes, hard-boiled eggs, halved, sprinkled with a little salt & pepper, some pitted, marinated green & brown olives, and some jarred tuna fillets in olive oil (check out Tonnino brand – we love the jalapeno flavor, one of my favorite pantry staples, and perfect for picnics if you don’t use them in this salad).

Anchovies don’t really agree with me this pregnancy, so I’ll recommend this shallot-dijon vinaigrette instead: Whisk together dijon mustard, sherry vinegar, a little red wine vinegar, minced shallot, a little agave nectar for sweetness, salt and pepper. Add olive oil in a steady stream and continue to whisk until incorporated. Taste and adjust ingredients as necessary. Drizzle the dressing over the top of the salad and all its colorful components. Let your plate be your blank canvas and feel free to tweak things depending on what fresh produce you have available. I hope that I inspired you 🙂 Happy Memorial Day Weekend, everyone!

Top 12 in 2012

Oishii celebrated its 5th anniversary this year, and yet I’ve never presented my readers with a top 10 (or in this case 12 for ’12) post as a way to usher in the new year. Why? Perhaps I’m just not a jump-the-bandwagon type of  person if it appears that everyone else is doing something. But this year, I get it. I realize that it’s a way to look back on the year and remember the good times and even the bad times through the lens of food and the people you shared it with. As we get ready to bid farewell to 2012 (we plan on staying in, eating cheese fondue, and playing Scrabble), I present to you YOUR favorite recipes from this year. Cheers, readers!

12. Blueberry Cupcakes with Brown Sugar Cream Cheese Frosting

cupcakes 2
I made these cupcakes for Levi’s 2nd birthday last spring. I’m not sure which one was more satisfying – the brown sugar cream cheese frosting or the look on Levi’s face when he got to lick the beater after I made it :). I don’t by any means consider myself an avid baker or cake decorator, so I was thrilled when I received such positive feedback on these tasty cupcakes. They were made with love for my little boy!

11. Grilled Pita Bread

pita 4
They’re chewy, they’re hot off the grill, and their pockets can be filled with everything from scrambled eggs to falafel. Homemade pita bread was definitely one our favorite summer recipes and this recipe (originally from Fine Cooking) got lots of fan love.

10. Roasted Figs with Prosciutto & Blue Cheese

fig 3
Three main ingredients – one incredible appetizer. These would be a great addition to a New Years Eve appetizer spread.

9. Tori no Karaage (Japanese Fried Chicken) with Wasabi-Potato Salad

Japanese fried chicken4
We nostalgically refer to Tori no Karaage as “Japanese festival chicken,” because whether the occasion was cherry blossom-viewing in the spring or a hanabi (fireworks) show in the summer, we could always count on there being a fried chicken stand, and it was one of our comfort foods while living in Japan. This post got lots of views this year thanks to Foodgawker.

8. Ultimate Sriracha Burger

ultimate sriracha burger 1
I was happy to see that the Sriracha Burger was in the top 10 in both 2011 and 2012. Let me break it down for you again: a buttery brioche bun, grilled grass-fed beef patty seasoned with Sriracha and soy sauce, bacon, caramelized onions, nutty swiss cheese, peppery arugula, tomato, and a secret sauce of tangy blue cheese dressing mixed with Sriracha. What? You haven’t made these yet? Get on it!

7. Cheesy Chicken & Rice Bake

chicken_rice_casserole2
Who knew that something Dustin threw together on a whim in response to one of my pregnancy cravings would be such a hit? This humble, comforting dish is very versatile – you can add whatever veggies and leftover cooked meat that you have on hand.

6. Grilled Shrimp Tacos with Jalapeño-Ranch Sauce

shrimp tacos 1
We made these tacos for a summer recipe swap, and they were very well-received in the blogosphere. When grilling season rolls around again, you’ll love the charcoal flavor of the grilled shrimp, and the kick of Jalapeño in the zesty ranch sauce.

5. Goat Cheese, Tomato & Basil Stuffed Portobello Mushrooms

grilled portobellos 1
These grilled portobello mushrooms stuffed with goat cheese, tomatoes and basil were our most popular vegetarian dish of the year.  If you’re hungry for more stuffed portobellos, try Grilled Portobello Mushrooms with Goat Cheese and Olive-Caper-Pepper Relish or Portobello Mushrooms with Creamy Spinach-Artichoke Filling.

4. Chorizo Mac & Cheese with Crispy Panko Topping

chorizo mac
We took our favorite baked mac and cheese recipe (courtesy of Alton Brown) and added chorizo to give it a little Mexican flair. Yum. Last winter we quadrupled (!!) this recipe, omitted the chorizo, and made it for 12+ extended family members who we were visiting down in southern California.

3. Camarones a la Diabla

camarones3
My best friend and I made this shrimp in a spicy, smoky, chile-tomato sauce, inspired by a dish at our favorite Mexican restaurant. It was a hit this year in many of your homes as well.

2. Baked Eggs in Puff Pastry with Goat Cheese & Bacon

baked eggs 4
Another successful recipe-swap assignment, we loved these baked eggs in puff pastry with a little goat cheese & bacon surprise in the middle. This recipe was our most-pinned recipe in 2012 and I can understand why. Try these for your next brunch, or if you happen to be craving something breakfast-y for dinner.

1. Simple Pan-Roasted Pork Loin Chops

pork loin chops 1
One of our simplest recipes made it to the #1 spot this year, which made me happy because I’m a firm believer that simple is almost always best (one of the reasons why I love Alice Waters and her whole philosophy on food). Just a quick marinade of olive oil, fresh chopped rosemary from the garden, garlic, salt, and pepper ready these pork loin chops for a sear in a hot skillet before finishing up in the oven. Hello, easy weeknight dinner!

Well, there we have it, folks – your favorite Oishii recipes in 2012. Have a festive, delicious, safe new year and we’ll see you in 2013! A year of new beginnings!

Spicy Dungeness Crab & Artichoke Melts

Dungeness Crab & Artichoke Melts

Spicy Dungeness Crab & Artichoke Melts

You know what makes me happy every year in early November? A mountain of Dungeness crab meat. When the crabbing season opens and those first boats leave the harbor with their crab traps, us West-coasters know we’re in for a treat.

In my town I think the best place to eat Dungeness crab is little place out on the wharf called Stagnaro’s. Downstairs there is a fish market with a walk-up counter where you can order a crab or shrimp cocktail, a burger, or a whole fish or fresh live crab to take home with you. Inside is a casual sit-down seafood restaurant. But the real treat (and where we love to take out of town visitors) is the upstairs bar, which has an outdoor deck, a panoramic view of the Monterey Bay, and a mean Dungeness crab cocktail. For some reason, the deck is usually vacant, but we have no idea why. It may be a little breezy out there and the seagulls can be loud, but it’s hard to beat the view of the ocean. Look one direction and you see our lighthouse proudly perched on the end of the cliffs with Cowell’s and Steamers (popular surf spots) down below. Look the other direction and you take in a view of the Boardwalk, the sandy beaches dotted with tourists, locals, and beach volleyball enthusiasts alike, and the Santa Cruz mountains standing tall in the background. If you’re lucky, you’ll look down at the water just below you and watch a sea otter eat a sea urchin, or a pack of sea lions splashing and bellowing. All of this while digging into a fresh Dungeness crab cocktail, biting into a warm buttered sourdough roll, and sipping a local pale ale. Sound enticing?

These open-faced sandwiches are piled high with  fresh crab meat that’s been mixed with chopped marinated artichokes, green onions, just enough mayonnaise to hold it together, some lemon zest, and a little minced jalapeño for heat. You top them with sharp cheddar, stick them under the broiler, and you have a satisfying meal that celebrates both the crustacean it highlights and the season.

The recipe comes from a cookbook that I received as a gift from my Grandma who lives in Alaska. It is a collection of stories and recipes from female commercial fisherwomen. The only changes we made to the original recipe were adding a little lemon zest to the crab mixture (because I think lemon and crab are a match made in heaven), using sourdough bread instead of french bread (just a personal preference), and buttering the bread before broiling (why not?). Our changes are noted below. Not in the mood for a spicy sandwich? Simply add less jalapeño or leave it out completely.

We went the economical and labor-intensive route by purchasing a whole Dungeness crab and taking the meat out ourselves (just ask your butcher to crack and clean it for you and it will make the process easier). You can buy Dungeness crab meat, but the price per pound will be slightly more because of the labor involved. It’s up to you! If you can’t find Dungeness crab, substitute whatever crab meat is available to you.

Dungeness Crab & Artichoke Melts

Spicy Dungeness Crab & Artichoke Melts

Spicy Dungeness Crab & Artichoke Melts

(Slightly adapted from The Fishes & Dishes Cookbook; Makes 4 Servings)

1 1/2 cups shelled crab meat, shredded
1 cup marinated artichoke hearts, coarsely chopped
1 to 2 TBS. minced fresh jalapeño
1 tsp. minced garlic
a couple pinches of fresh lemon zest
1/4 cup mayonnaise
1/2 cup grated Parmesan cheese
1 green onion, white and light green parts, sliced
salt & freshly ground black pepper to taste
4 large slices of sourdough bread from a round sourdough loaf
butter
1 cup shredded sharp cheddar cheese
chopped fresh parsley for garnish

  • Preheat the broiler and set the rack on the middle level.
  • In a medium bowl, mix together the crab meat, artichoke hearts, jalapeño, garlic, lemon zest, mayonnaise, Parmesan cheese, green onion, salt and pepper.
  • Lightly butter the sourdough bread slices on both sides and place under the broiler until lightly golden. Turn them over and broil until other side is lightly golden. Remove from oven and spread each toasted slice of bread with the crab-artichoke mixture. Top with cheddar cheese. Place the open-faced sandwiches back under the broiler and cook until topping is hot and bubbly, about 2-3 minutes. Sprinkle with chopped parsley and serve hot.
Dungeness Crabs (photo from Santa Cruz Sentinel)

Dungeness Crabs (photo from Santa Cruz Sentinel)

Pot O’ Beans, Mediterranean-Style

Pot ‘O Beans, Mediterranean Style

We left you hanging in October, due to a swarm of continuous activity gearing up for Discretion Brewing’s opening in January. Our apologies. Now here we find ourselves in early December. We hope you had a warm, festive, delicious Thanksgiving with the people who are dearest to you. Are your holiday decorations up? Have you checked any gifts off your list? The temperatures are dropping, the rain is coming, and it’s the perfect weather for a big pot o’ beans.

Beans are a versatile protein that can be thrown in a pot with any cuisine’s flavor profile. Think of them as a blank canvas. As they cook, your house will smell fantastic and make you feel good about yourself. It’s true.

Photo from the Rancho Gordo website.

Photo from the Rancho Gordo website.


The beans
– If you’re going to make beans the star of the meal, you’ll want to use dried beans. Quality is key –  I love using Rancho Gordo heirloom beans. Soak them the night before you want to cook them.

The flavor base – Heat olive oil in deep pot. Add diced onion, garlic, and whatever cubed veggies fit with your theme, along with the spices that you think might compliment them – think fennel, carrots, oregano, rosemary, thyme. Or Jalapeño peppers, cumin, coriander, chile powder.

The cooking liquid – Nothing beats home-made stock. We roasted a chicken a couple days ago in anticipation of this dish, using spices and ingredients that we thought might compliment it. Don’t have time to roast a chicken? Store-bought chicken stock will do. Or beer (good beer) is a wonderful cooking liquid (says the girl who’s involved in opening a brewery).

The finish – A squeeze of lemon; a squeeze of lime; a splash of vinegar. A little acid adds a bright finish to your pot o’ beans.

The accompaniments – Did your beans take a turn towards Mexico? Serve with warmed tortillas and cubed avocado on the side. Did curry make its way into the pot? Try store-bought naan (Stonefire naan is a great brand) warmed in the oven and brushed with melted butter. Did you go the Mediterranean route like we did? Serve with crostini.

By all means, use this recipe as a guideline. Feel free to experiment with ingredients. Serves 4-6.

Pot O’ Beans, Mediterranean Style

Pot O’ Beans, Mediterranean Style

(This is a recipe we’ve made several times without measuring anything, but this time I referred to this recipe from Martha Stewart, in order to give you some correct ratios. Enjoy!)

1/2 lb. dried heirloom beans (such as pinto or cranberry)
extra virgin olive oil
1 medium yellow onion, diced
2 cloves garlic, minced
1/2 a fennel bulb, diced
1 large carrot, diced
rosemary (about 2 sprigs, chopped)
dried oregano
dried thyme
cumin
cayenne
salt & pepper
4 cups chicken stock (preferably home-made)
1/2 a large lemon (we used a Meyer lemon from our tree in the front yard), zest and juice.

  • The night before you want to make your pot o’ beans, don’t forget to soak them! Place the dried beans in a bowl and cover with cold water (by 2 inches or so). The next morning, drain and set aside. Oh crap! You forgot? It’s ok – for a quick soak, cover beans in a saucepan with water. Bring to a boil. Remove from heat. Let stand, covered, for 1 hour. Drain. Phew.
  • Heat 2 TBS. of olive oil in the bottom of a deep pot. Cook onion, garlic, fennel, carrot, 1/2 tsp. salt, freshly ground pepper, and any other add-ins until onion and garlic are soft, about 5 minutes.
  • Add beans, 4 cups broth, and another 1/2 tsp. salt. Bring to a boil. Reduce heat. Simmer, partially covered, until tender, 1 to 2.5 hours, depending on type of bean (our cranberry beans took 2.5 hours). Add more liquid during the cooking process, if necessary.
  • Add the zest of half a lemon (we used a vegetable peeler and added several big pieces of  zest that we removed before serving). Taste and add more salt to taste. Add the lemon juice if you desire. Serve with crostini on the side – we rubbed slices of sweet baguette with garlic, brushed them with olive oil, and threw them in a 350 degree oven until crispy and golden (turning once), about 12 minutes.

Mexican Stuffed Shells


A new restaurant opened up in town last year called MexItalian – serving Latin-Mediterranean fusion cuisine. One of my favorite entrées there is a Parmigiana Mexicana, breaded eggplant that’s lightly fried, and layered with Parmesan cheese and salsa picante and then roasted. As I was perusing the many enticing recipes on Jenna’s Cooking Journey, my blog assignment for this “Blogger’s Choice” recipe swap, I came across a recipe for Mexican Stuffed Shells, and immediately thought of that Mexican-style Eggplant Parmigiana. I love fusion recipes, but for some reason tend to gravitate more towards Asian fusion ones (no surprise, I guess, considering the name and story behind this food blog). Well, this recipe broadened my horizons a bit. And when rain graced the central coast’s presence last week,  I was looking for a nice comforting recipe that would require turning on the oven. This one fit the bill.

Jumbo pasta shells are stuffed with ground turkey (or you could use ground beef) that’s seasoned with taco seasoning and made creamy with a little cream cheese. Then you lay the stuffed shells in a baking dish on top of a layer of salsa and cover them liberally with taco sauce. After a good half hour in the oven, you cover them with grated jack cheese and return them to the oven until golden and bubbly. A scattering of green onions and a couple dollops of sour cream finish off this Mexican-Italian fusion dish.

This is one of those recipes that we’d love to try again with some different ingredients just to change it up a bit. While we liked the combination of fresh salsa (we used a locally-made one that we love) and taco sauce from a bottle, I think it would be even more delicious with a home-made enchilada sauce, something with a nice smoky/spicy depth of flavor – one that can only come from your own kitchen, opposed to something from a bottle.

But overall, this is a crowd-pleasing dish, a great twist on your usual stuffed shells, and makes excellent leftovers.Thanks, Jenna!

Click on the icon at the bottom of this post to view all of the blogs that participated in this recipe swap! It’s sure to be a great round-up of recipes.


Mexican Stuffed Shells

(Slightly adapted from Jenna’s Cooking Journey, as seen on The Way to His Heart, from which I then traced back through 5 more blogs until I got to blogchef.net. This recipe has sure gotten around the food blog world, which is a good sign!)

1 lb. ground turkey
1 package low-sodium taco seasoning (or use your own, which I should have done, but was feeling lazy :))
4 oz. cream cheese (I used more like 2-3 oz.)
1/2 a box of jumbo pasta shells (recipe specified 14-16 but I didn’t count – was probably over 20 shells)
1 1/2 to 2 cups salsa (I used a fresh salsa that’s made locally – Roberto’s)
1 cup taco sauce (such as La Victoria brand – I didn’t measure, but used almost an entire 8 oz. bottle)
2 cups grated Monterey jack cheese
3 green onions, sliced
Sour cream

  • Preheat oven to 350°.
  • In a frying pan, brown the turkey, using a wooden spoon to break up the pieces as it cooks. Drain, if needed (our turkey was pretty lean). Add taco seasoning and prepare according to the package directions. In our case, add the seasoning packet, 2/3 cup water, bring to a boil, then turn heat down to low and simmer, stirring occasionally, for 5 minutes. Add cream cheese, cover and simmer until cheese is melted. Blend well. Turn off heat, set aside, and allow to cool.
  • Meanwhile, cook the pasta shells according to directions, 8-9 minutes in our case; drain. Set shells out individually on cutting board/baking sheet so that they don’t stick together. Allow to cool before handling.
  • Pour salsa into the bottom of a 9×13 baking dish.  Using a spoon, gently fill each shell with the meat mixture and place it in the dish on top of the salsa, open-side up. Cover shells with taco sauce (we drizzled a little over each one – we also spooned a little more salsa on top of each shell). Cover with foil and bake for 30 minutes.
  • After 30 minutes, add grated cheese and bake for 10-15 minutes more, uncovered.  Top with green onions and serve with sour cream on the side.


Korean Short Ribs with Kimchi and Greens Namul


My husband is a sucker for grocery store samples, which is why last weekend after trying a bite of Mother-in-Law’s Napa Cabbage Kimchi, a big jar of it found its way into our cart. We’re no strangers to the spicy, pickled, fermented cabbage that bubbles as you open the jar, reminding you that it’s happily alive with probiotics. In fact, we were fortunate enough to have our first taste of the stuff in Korea, where it originated. It didn’t take long. We were hooked.


With the jar of kimchi now in our cart, we decided a Korean-inspired dinner was in order. What a coincidence that our butcher recently started carrying Korean short ribs! Also called the “flanken cut,” these beef ribs are cut straight through the bone and are about 1/2 an inch thick, making them ideal for quick cooking. The marinade is a tasty combination of puréed Asian pear, soy sauce, mirin, brown sugar, sesame oil, and garlic, and the ribs get even more flavor from throwing them on a charcoal grill. White rice and our kimchi were obvious accompaniments, but we went in search of another Korean side dish, and found the perfect one – namul (or namuru in Japanese, which you often find as a Bento Box filler). You blanch greens, squeeze out the liquid, roughly chop and throw in a bowl with sesame oil, garlic, and salt. So simple.


Our recently married friends (congrats, M+T!) joined us for this Korean-inspired dinner, and we successfully got them hooked on kimchi as well. The jar boasted a good 16 servings, but the 4 of us polished it off in one evening.


Korean Short Ribs

(Slightly adapted from The Paupered Chef)

3 lbs. short ribs
1/2 cup soy sauce
1 Asian pear, peeled and diced
1/4 cup mirin
1 TBS. brown sugar
1 TBS. sesame oil
4 garlic cloves, chopped

  • Place the diced asian pear in a large bowl and purée with an immersion blender (alternatively, use a food processor or blender).
  • Add the soy sauce, mirin, brown sugar, sesame oil, and garlic. Whisk until combined.
  • Put the short ribs in the bowl with the marinade.  Toss until coated evenly with the marinade.  Refrigerate for 3-5 hours.
  • Prepare a charcoal grill for high heat. Have a squirt bottle handy (I will explain in the next step).
  • Remove ribs from marinade and place on the grill. Cover. Because of the fat content, you might find that they flame up a little bit. That’s where our squirt bottle came in handy! But then they calmed down and cooked nicely, about 3-5 minutes per side. Serve with Greens Namul (recipe below), kimchi, and steamed white rice.


Greens Namul

(From Just Bento)

2 cups or so blanched greens (we used 1 large bunch of young, tender dandelion greens, and 2 bunches of spinach. Get more than you think you’ll need because they cook down a lot)
1 1/2 TBS. dark sesame oil
1/2 tsp. salt, or to taste
1 large garlic clove
1 TBS. toasted sesame seeds
Optional: pinch of sugar
Optional: chili oil

  • Before blanching your greens, first wash them very well to get all the grit off of them. If your greens have stalks, cut the tender part of the stalk thinly. Discard the tough part of the stalks, if any.
  • Bring a pot of water to boil. First put in the stalks, then the greens that take the longest to cook (we threw our dandelion greens in first). Boil for 1-2 minutes, then put in the spinach. Boil for another minute or less. You don’t want your greens to turn to mush.
  • Turn off the heat. Drain the greens well, then add cold water to refresh and cool them. Drain again and squeeze out the moisture well. Roughly chop. Transfer to a bowl.
  • Grate the garlic clove on a fine grater, or smash it to a pulp with a knife (we did the latter). Mix with the salt and oil. Use your hands to mix the garlic mixture into the well drained and squeezed out greens. Mix in the sesame seeds. Taste, and adjust the seasoning, adding more salt if necessary, or adding a little bit of sugar if the greens are too bitter. If you want it spicy, add a few drops of chili oil.

Caprese Grilled Cheese


Pardon our absence! It’s been a whirlwind of a summer, but I know that our blog readers are awesome and will forgive us.

It started with the passing of my dear Grandma, and that’s all I can say about that right now, because I’d prefer to write this blog post with clear eyes.

And then our whole family had the privilege of being involved in the wedding of two wonderful friends. Levi made his first ring bearer debut, I had my first bridesmaid experience (and first ever manicure – thanks, Miriam!), and Dustin was a groomsman. It was a truly joyful event!

Throw several bridal showers into the mix (from Modesto to Mill Valley, all the way down to San Diego), a toddler who has officially entered the terrible twos (though I’m still incredibly blessed to be his mommy – I love seeing how his personality is blooming), and the fact that the whole family is gearing up for Discretion Brewing‘s opening this fall, and you have a summer that basically  flew by in the blink of an eye. You also have what might have been the world’s longest run on sentence. So I’m a little rusty, folks, but it’s okay, because I really just want to share this grilled cheese recipe with you. We ate it voraciously this evening.

Fall is approaching, and we must embrace tomatoes while we still can! This grilled cheese sandwich consists of two kinds of tomatoes – a yellow heirloom  and a red dry farmed variety, fresh mozzarella cheese, fresh basil from our garden, and a drizzle of balsamic vinegar. What makes it extra special? The bread. I spread sliced sweet french bread with butter, and seasoned it with garlic powder and oregano. So, basically you have two pieces of garlic bread sandwiching your Caprese salad – a cool center and a warm outside. Now that’s going out (of summer) with a bang.

As we bid farewell to summer (wait, I blinked – what happened to it?) and say hello to fall, a season near and dear to my heart, I may not be posting quite as frequently, as we are all working hard towards our brewery’s opening (stay on top of our progress and find out our opening date on our Facebook page!) But when I’m not crazy-busy, I will continue to share with you what’s coming out of our kitchen.

Bon Appetite and Cheers, dear readers!


Caprese Grilled Cheese

4 Slices French bread
Butter (salted is preferred), at room temperature
Garlic powder
Dried oregano
Fresh Mozzarella, sliced
Heirloom and/or dry farmed tomatoes, sliced
Salt & freshly ground black pepper
Balsamic vinegar
Fresh, whole basil leaves

  • Preheat your broiler.
  • Spread your bread slices on both sides (gasp!) with butter. Season with garlic powder and oregano.
  • Place buttered/seasoned slices on a foil-lined baking sheet. Place under the broiler and broil until nice and golden. Flip, and broil until the other side is golden. Remove baking sheet from oven. Turn off broiler and heat oven to 400 degrees.
  • On two of the bread slices, pile on sliced mozzarella and sliced tomatoes. Season the tomatoes lightly with salt and pepper and a splash of balsamic vinegar. Add the fresh basil leaves. Top with the remaining two slices of bread. Return to oven for just a few minutes. The middle of the sandwich will still be cool (like a caprese salad) but you want to warm up the bread just a little before serving. Enjoy! Makes 2 caprese grilled cheese sandwiches.

Grilled Portobello Mushrooms with Goat Cheese and Olive-Caper-Pepper Relish

A couple Saturdays ago we were making scrambled eggs for breakfast, and while we weren’t looking, Levi grabbed the cumin from the spice rack, unscrewed the top, and sprinkled some into the eggs. It threw me off (though I was thankful he chose the cumin over the cinnamon). Dustin ran with it. He added some chopped kalamata olives, onions, peppers, and tomatoes and called it a Mediterranean scramble. Then he served it over toasted pita bread spread with goat cheese. Brilliant. Thanks, Levi, for unintentionally (or intentionally?) pointing us in the direction of an awesome breakfast.

Last summer we grilled portobello mushrooms and filled them with goat cheese, fresh tomatoes, and basil. We thought they would be pretty hard to beat. The weekend after the Mediterranean scramble incident, we filled the same umami-packed mushroom caps with goat cheese and a relish made from capers, olives, grilled red peppers, garlic, oregano, and olive oil. The flavors are reminiscent of a Muffaletta sandwich, but a vegetarian version; the portobellos, of course, standing in for the cold cuts. Lately I’ve been obsessed with the combination of capers and olives and how their brininess brightens up grilled meats, seafood, pasta dishes, and in this case, grilled mushrooms. Before grilling them, I added a few dashes of soy sauce and Worcestershire sauce, just to add a little depth of flavor.

While the weather is still nice, and the grill is accessible, try this meatless meal that boasts of bright flavors and easy preparation (make the relish ahead of time!) And make sure your spice lids are screwed on tight if you have a toddler accompanying you in the kitchen 😉


Grilled Portobello Mushrooms with Goat Cheese & Caper-Olive-Red Pepper Relish

(Inspired by Levi’s addition to our scrambled eggs, and the “Vegetarian Muffaletta Wraps” in the book The Fifth Taste – Cooking with Umami; Serves 3-4 – we had some extra filling after stuffing our 3 mushrooms)

3 large portobello mushrooms
Olive oil for brushing
Worcestershire sauce
Soy sauce
Salt & Pepper
1/2 a small red bell pepper
1/4 cup roughly chopped kalamata olives
1/4 cup roughly chopped Spanish olives with pimentos
1 1/2 tsp. minced capers
2 tsp. minced fresh parsley
1 small garlic clove, minced
1/2 tsp. dried oregano
2 TBS. extra virgin olive oil
4 oz. soft, fresh goat cheese, at room temperature

  • Prepare a charcoal grill for low-medium heat (by controlling the vents to allow the coats to die down).
  • Twist the stems off the portobello mushrooms and scrape the gills out using a butter knife or spoon, discarding stems and gills. Brush or drizzle the mushrooms on both sides with olive oil, a splash of soy sauce, and a splash of Worcestershire. Set aside.
  • Remove the seeds and ribs from the bell pepper half and brush or drizzle with olive oil. Season with salt and pepper.
  • In a medium bowl, toss together the olives, capers, parsley, garlic, oregano, and olive oil to combine.
  • When the grill is ready, grill the red bell pepper until blistered and soft. Remove from grill, cool slightly and roughly chop. Add to olive-caper mixture.
  • Grill the portobello mushrooms gill-side down for 5-7 minutes and until nice grill marks form. Flip so they are cap-side down and continue to cook for several more minutes or until almost tender. Carefully spoon some goat cheese into each mushroom cap and spread  into a thin layer. Spoon the olive-caper-pepper relish on top of the goat cheese. Cover the grill and cook until the mushrooms are tender and the filling is warmed, about 2 minutes.

Grilled Opah with Hawaiian Sea Salt and Mango-Papaya-Avocado Salsa


Opah is a Hawaiian fish that grills beautifully thanks to its meaty texture, but has a mild flavor that even hesitant fish eaters can appreciate, especially when topped with a fresh tropical fruit salsa with creamy avocado. I don’t know about you, but I sure could use a mental vacation right now, in lieu of real one, which would require too much money and require boarding a plane with my toddler.


I’ll never forget our last spring break in Japan in 2008 when we met my family in Kauai for several days.  On our second evening there, my dad barbecued mahi-mahi and opakapaka (Hawaiian pink snapper) and we ate on the ocean-view porch of our Waimea Plantation Cottage. The combination of the grilled local fish, the mai tais, and the sunset was heaven, and it fully rejuvenated us to return to Japan to finish up our semester of English classes.

Dustin was recently given two types of Hawaiian sea salt as a gift from a co-worker. When we saw the beautiful Opah fillets at the fish counter, we remembered our Kauai vacation and knew they would be a perfect match for our Hawaiian salt. The first one is “Black Lava” and is a mixture of flake sea salt and charcoal, hence its pitch black color. The other is “Alaea Red” and is a coarse sea salt that gets its color from ‘Alaea or Hawaiian red clay.


When we took the Opah off of the grill, we let it rest  like you would with any thick cut of meat, then topped it with generous spoonfuls of our colorful mango-papaya-avocado salsa, and served it next to a scoop of white rice, sprinkled with a little of the black lava salt. Some arugula lightly dressed with fresh lemon rounded out this healthy summer dinner. If you don’t have a Hawaiian vacation coming up (I can sympathize), make this for dinner, fix yourself a mai tai (or pour yourself a glass of beer – beer pairing suggestion below), enjoy the lingering daylight, and give yourself a break. You deserve it. Sunset not included.


Grilled Opah with Hawaiian Sea Salt and Mango-Papaya-Avocado Salsa

(serves 4)

2 lbs. Hawaiian Opah*
Extra virgin olive oil
Hawaiian sea salt (check out www.alohaspice.com for the varieties I mentioned) or just sub coarse salt or Kosher salt
1 mango, pitted, peeled, and diced (don’t know the best way to cut a mango? Here’s a hint)
1 small papaya, peeled, seeds removed, and diced
1 ripe avocado, diced
Juice from 1 small lime (or to taste)
Agave nectar, to taste
A pinch of chili flakes (optional, but tasty)
Accompaniments: steamed rice; arugula tossed with fresh lemon juice

*We bought one huge piece of Opah that we later cut into individual portions, but you can also buy 4 fillets, about 1/2 a lb. each

  • Take the Opah out of the refrigerator rub with olive oil. Season lightly with sea salt (we used a little of each variety of Hawaiian sea salt) and set aside (at room temperature). Meanwhile, prepare a charcoal grill (or a gas grill on high heat).
  • In a small bowl, combine the mango, papaya, and avocado. Add lime juice, a drizzle of agave nectar, the chili flakes (if using), and a little salt and pepper. Gently stir everything together, taste, and adjust seasonings as necessary. Cover and refrigerate.
  • When the grill is ready, oil the grill grates. Add the Opah and grill until just cooked through, but not overdone, about 3-6 minutes per side, depending on the thickness of your fillets (ours were about 2-3 inches). Let rest for a couple minutes, then cut into 4 pieces.
  • Place the Opah on plates and spoon some salsa over the top. Serve with steamed rice, and a handful of arugula tossed with some freshly squeezed lemon juice. Go ahead and add a little sprinkling of sea salt too!

Beer Pairing Suggestion: We opened up a bottle of Tiger Baby: Open Windows Open Hills (how’s that for a name!? – it’s actually named after a Danish electro-pop group) by Mikkeller. To quote one fan from Beer Advocate:  ” In the aroma, citrus notes of island fruit. In the taste, sweet to dry fruitiness and citrus, especially mango. A small fruit bite and a medium bodied mouthfeel, with a small citrus fruit skin in the aftertaste. Big fruity presence, almost chardonnay like, quite superb!” We happened to agree. It went especially well with the mango-papaya-avocado salsa.

Strawberry Banana Bread


The bounty of berries and stone fruits available right now makes this household very happy, especially the two-year-old fruit fiend. As much as I love apples and pears in the fall, there’s something very gratifying about filling up our shopping cart in the summertime with 6-8 different varieties of fruit. This week we went home with plums, apriums (which look like apricots, but are sweeter and juicer thanks to the plum in them!), white peaches, nectarines, blueberries, and strawberries.

We’re definitely embracing the strawberries these days, as their window for consumption is shorter than that of other summer fruits. The strawberries that we buy from our grocery store come from just up the coast at Swanton Berry Farm and are so sweet and irresistible.


Hey! Who stole my garnish? 🙂

It’s time for another “Blogger’s Choice” recipe swap, hosted by A Taste of Home Cooking. I was assigned Carrie’s Sweet Life, from which to choose a recipe to make and then share with you. Carrie is the mom of two adorable little girls, and I love reading about all of the delicious things that come out of her kitchen. When I saw her recent post about Strawberry Banana Bread, I knew that it would be the perfect use for some of our strawberries.

I made a few changes, but nothing major. I used butter in place of the olive oil (best choice health-wise? No, but my favorite banana bread recipe calls for butter and I’m addicted to the flavor that it produces). Instead of mashing the strawberries, I chopped them up so that you get more intense bursts of strawberry flavor in every bite. I also swapped out 1/2 a cup of the all purpose flour for whole wheat flour, added a bit more salt, and reduced the amount of orange zest by 1 tsp. to really highlight the strawberry/banana flavors. Oh, and I mixed everything by hand instead of using a mixer. My changes are reflected below. Thanks, Carrie, for a fun, seasonal twist on banana bread. Hooray for strawberry season!


Strawberry Banana Bread

(Slightly adapted from Carrie’s Sweet Life; originally from Cook with Sara)

1/2 cup butter (8 TBS.), softened
1 cup sugar
2 eggs
3/4 cup fresh strawberries, chopped
3/4 cup mashed banana (I used 2 bananas)
1 tsp. vanilla
1 tsp. orange zest
1 cup all purpose flour
1/2 cup whole wheat flour
1/2 tsp. baking soda
1/2 tsp. salt
1/2 tsp. cinnamon
1/8 tsp. nutmeg

  • Preheat your oven to 350 degrees. Grease a loaf pan and set aside.
  • In a large bowl, cream the butter and the sugar until light and fluffy. Add eggs, one at a time, beating well after each addition. Add the strawberries, banana, vanilla, and orange zest and stir until well-combined. In a small bowl, whisk together the flour, whole wheat flour, baking soda, salt, cinnamon, and nutmeg. Gradually add the flour mixture to the creamed butter mixture, mixing just until flour disappears.
  • Pour batter into prepared loaf pan and bake for 1 hour or until a toothpick inserted into the center of the bread comes out clean (mine took about 1 hour and 10 minutes). Cool on a wire rack, then remove from pan, slice, and enjoy. I especially enjoyed it the next morning, toasted up in the toaster oven with a little butter on top.

Five Years – Thank You!


It started exactly five years ago on a balmy Osaka summer evening.  Dustin and I, newlyweds living in Japan, rode our bikes home from our late afternoon English classes and threw together an Asian Chicken Salad with Crunchy Ramen Noodles in our petite Japanese kitchen. We sat down to our creation, discussed the highlights (my student told me that because of me, she likes English and is longer embarrassed to speak) and low-points (I can’t believe I bought a huge box of cornstarch instead of powdered sugar – I couldn’t read the characters!) of the day, and then decided that we wanted to start a food blog.

We were both fairly new to cooking (fresh from college life, where we lived on quesadillas, pasta with jarred sauce, and store-bought garlic bread) and wanted to document the meals that we deemed worthy of remembering, as we branched out and tried new things, using the ingredients that were available to us at our supermarket across the street. We also wanted to share some of our cultural experiences with our friends and family back at home. I’ve always loved writing, and I was in need of a hobby that could double as a creative outlet. Deciding on a blog name was a piece of cake. Oishii means “delicious” in Japanese, and it’s what you heard whenever you were in the vicinity of Japanese people enjoying their food. It quickly became one of our favorite Japanese words as well.

Those of you who have followed along from the beginning joined us in many adventures, meals, and food-related musings.

You were there … when we acquired our first pet, a street kitten who we lured with a string, brought home, and named Arius. He helped us through the hard days when we felt overwhelmed by cultural differences, or missed our families at home.

… as we became more comfortable in our little kitchen and learned how to navigate the buttons on our Japanese oven that looked like a microwave.

… as we mastered our chopstick skills out in public and enjoyed many delicious outings with our students (in this picture I was just about to eat a piece of stomach stewed in miso at a Kushi-Katsu restaurant, specializing in fried things on sticks).

… as we shared plenty of laughs, discussions, snacks and tea during our English lessons. This was my Tuesday evening class enjoying my great-great-grandma Selma’s oatmeal cookies. They wouldn’t let me move back to California without sharing the recipe.

… as we made many dear friends, who opened their homes to us, taught us how to cook Japanese dishes, cooked us many Japanese dishes, translated labels and recipes for us, remembered and celebrated our birthdays, and became our family members away from home.

As we transitioned back to living in our own country, and settled down in Santa Cruz, California, you were there when we announced the birth of our beautiful son Levi, future foodie.

And now here you are, still reading. While I don’t post quite as frequently as I did before Levi was born, I like to think that over the past 5 years, I’ve grown as a traveler, writer, cook, food photographer, mom, and overall person. Thank you for reading what I’ve had to say and cooking what we’ve shared with you. Oishii was created to share good food (or at its beginnings, our attempts at good food) as well as meaningful commentary that gives a little glimpse into our lives. I hope you’ll continue to follow along, because there is still so much to eat, and so many experiences to be had. I’ve only just begun …

Happy 5th Birthday, little blog! I like what you’ve become.

Pork Scaloppine with Lemon, Capers, and Arugula with Zucchini Pancakes


I’ve always loved to read cookbooks; I certainly grew up around plenty of them, along with every issue of Gourmet since the late 60s. We have three shelves in our own kitchen that are filled with cookbooks and another bookshelf in the living room that’s reserved for food magazines (because apparently it’s in my genes; I can’t throw them away). The cookbooks’ colorful bindings caught Levi’s eye at a young age. In fact, he invented a game with his grandma called “count the cookbooks” – we stand in front of the shelves and he makes his counting sound, which sounds like “one-two-one-two” repeated over and over, while pointing to as many as he can.

I’ve been drooling over this particular one for a while now; I bought it as a gift for my mom several years ago and just recently acquired it last Christmas, thanks to my aunt and uncle – Heart of the Artichoke by David Tanis. For more than 25 years, he was the chef at Alice Waters’ restaurant, Chez Panisse in Berkeley (retired in October), which I’ve mentioned before is one of my absolute favorite restaurants. The set menu in the fancy downstairs restaurant changes nightly and revolves around whatever fresh, seasonal ingredients are available on that particular day, and the café  upstairs offers seasonally inspired pastas, pizzas and more in a slightly more casual, kid-friendly environment. Heart of the Artichoke features several menus for each season, prefaced with a section called “Kitchen Rituals” where he shares 14 “cooking moments” – either small cooking projects for 1 or 2 people, or simply a food experience/memory, such as eating oatmeal for breakfast as a child.

This meal in the “Spring Menus” section was beckoning to me back in March, but I was jumping the gun a bit with my seasons and zucchini had not yet appeared at the store. Now that it’s June, it’s plentiful, and I’m glad that I saw the bookmark in my cookbook, reminding me to make pork scaloppine with zucchini pancakes! It’s a wonderful feeling when you sit down to dinner, take that first bite, and exclaim “hey, I’d pay for this.” That was the case for this meal, so naturally, I’m recommending this cookbook for those who strive to eat simply and by the seasons!

The thin slices of pork for the scaloppine come from the lean end of a boneless pork loin (ask your butcher to do this and hopefully yours will happily comply as ours did). They cook nice and quickly and remain tender. The sauce takes under 60 seconds to make but is full of bright flavors (in fact, if you decide to halve this recipe for a family of 2-3, I’d recommend making the full amount of sauce; it won’t go to waste). You simply heat olive oil in a skillet, add garlic, capers, lemon zest, and parsley and let it sizzle for just under a minute. You pour this awesome concoction on top of your slices of pork and top with verdant, peppery arugula and lemon wedges. You can see why taking that first bite made me happy. And I haven’t even gotten to the zucchini pancakes yet!


Grated zucchini and finely chopped green onion bound with egg and a little flour are fried in olive oil and scream “beginning of summer!” While they make a great accompaniment to the pork scaloppine, I plan on making them on their own as an appetizer sometime in the near future; Maybe topped with some minted yogurt or a dollop of fresh ricotta cheese. I made the zucchini pancakes first and kept them warm in a low oven while we cooked the pork (because we only have so many skillets), but they would be best eaten hot out of the pan!


Pork Scaloppine with Lemon, Capers, and Arugula

(From Heart of the Artichoke by David Tanis – Serves 4-6)

12 thin (about 3/8-inch-thick) slices pork loin
Salt & Pepper
1/2 cup olive oil (give or take)
2 TBS. roughly chopped parsley
2 tsp. grated lemon zest
1 TBS. capers, rinsed and roughly chopped
2 garlic cloves, finely chopped
1/2 lb. arugula, chopped (we bought baby arugula and left the leaves whole)
Lemon wedges

  • Season both sides of the pork slices with salt and pepper. Drizzle with olive oil. Heat 2 cast iron skillets over medium-high heat. When the pans are hot, lay 6 slices of pork in each pan and cook for about 2 minutes, or until nicely browned. Turn and cook for another 2 minutes on the other side. Remove the scaloppine from the pans and transfer to a warm serving platter.
  • In one of the pans, heat 2 TBS. of olive oil over medium heat. Add the parsley, lemon zest, capers, and garlic and let sizzle for a bare minute. Turn off the heat. Spoon the sauce over the scaloppine and top each slice of pork with a handful of arugula. Garnish with lemon wedges and serve immediately.


Zucchini Pancakes

(Also from Heart of the Artichoke by David Tanis – Serves 4-6)

8 to 10 small zucchini, about 3 lbs.
2 tsp. salt
2 eggs
1/2 tsp. pepper
1 bunch scallions, finely chopped
3 TBS. all-purpose flour
1/2 cup finely grated Parmigiano (optional – we decided to omit this as we wanted a pure zucchini flavor, but Tanis says that adding the cheese reminds him of eating a zucchini frittata, which sounds delicious)
Olive oil for frying

  • Grate the zucchini using the medium holes of a box grater. Toss the grated zucchini with the salt and let drain in a colander for about 20 min. Squeeze very dry, using a clean kitchen towel.
  • In a large mixing bowl, beat the eggs with the pepper and scallions. Add the flour, then add the grated zucchini and the cheese (if using). Mix thoroughly.
  • Pour olive oil into a cast iron skillet to a depth of 1/4 inch and heat over medium heat. Carefully place spoonfuls of the zucchini mixture into the pan and flatten into discs with a 2-inch diameter. Make a few at a time, so as not to overcrowd the pan. Turn them once, letting them cook for about 3-4 min. on each side or until golden. Keep the heat at moderate so they don’t brown too quickly. Serve immediately or transfer to a warm oven until the entire batch is cooked. Serve with the Pork Scaloppine.

That beer in the background? It was a German Hopf Helle Weisse – a type of Hefeweizen. It paired wonderfully with this meal.

Baked Eggs in Puff Pastry with Goat Cheese & Bacon


I love brunch, but since going out to eat involves taking turns chasing an active toddler around the restaurant, we prefer to make it at home, or better yet, make our favorite brunch dishes for dinner. For this Blogger’s Choice recipe swap (hosted by A Taste of Home Cooking), I was really excited to be assigned the blog The Jey of Cooking. I used the same decision-making tactic that I did for the previous blogger’s choice recipe swap and went straight to Jey’s Eleven Favorite Recipes for 2011, because I really wanted to make a recipe that was a top favorite in her home.

Second on that list, these baked eggs in puff pastry stood out to me. I was craving some sort of breakfast/brunch-for-dinner and this sounded perfect. The versatility of the dish also appealed to me. Jey used cheddar cheese and bacon in her baked eggs; the original recipe called for feta and prosciutto. We decided to use goat cheese (because we had some in the fridge to use up) and made half with prosciutto and half with El Salchichero‘s chorizo bacon (one of our favorites – I raved about it in this salad). When you cut into these flaky, buttery puff pastry “plates,” you find the cheese and the meat under the egg; bacon hidden in anything is a delightful surprise. I served our baked eggs in puff pastry with some roasted asparagus and a mixed greens salad, and Dustin picked out a bottle of this Saison that paired wonderfully with the whole meal.

I need to digress on baking eggs. I’m still waiting to get them right. My first attempt was for this Shakshuka recipe, and while it was delicious, the eggs were definitely overcooked. This time, guess what, I undercooked them, so I had to throw them back in the oven for a few minutes and they were still not as crispy and done as I had desired. I swear one of these days I’ll get it! Or perhaps I’ll just cheat and lay a fried egg on top of whatever called for a baked one. When I make these again, I’ll increase the initial baking of the puff pastry with the cheese and bacon, and also after cracking the eggs into them. I think this will result in a more golden puff pastry crust and a more perfectly cooked egg. The cooking times below reflect the original recipe, and I’m just going to blame my oven in the meantime 🙂

Happy brunch-ing or brinner-ing – whether you make it for breakfast for dinner, you’ll love this dish. Try it with a glass of Saison!

Please note – these pictures were taken before I realized that the whites were still slightly undercooked and that the puff pastry could use a bit more browning. Back into the oven they went, but by the time they were done, I was too hungry for another round of pictures 🙂


Baked Eggs in Puff Pastry with Goat Cheese & Bacon

(Slightly adapted from The Jey of Cooking; Originally from I Will Not Eat Oysters)

2 sheets puff pastry, defrosted*
goat cheese
2 slices prosciutto + 2 slices chorizo bacon (or regular bacon)
4 large eggs
2 TBS. Parmesan cheese, grated
Salt and freshly ground pepper
fresh parsley, chopped for garnish

*We were able to get four circles out of one puff pastry sheet

  • Preheat oven to 400 degrees F, and line a baking sheet with parchment paper.
  • Heat a large pan on med-high heat and drizzle a little olive oil into the pan. Cook the prosciutto (followed by the bacon) on both sides until crisp. Place on a paper towel to drain off any excess fat. Cool, then crumble and set aside.
  • Using a a bowl about 5″ in diameter, cut out 4 circles from the puff pastry. Transfer to the baking sheet. Score a border about 1/2″ in around each circle. Be sure to not cut all the way through! Prick the inside, not the border, with a fork. Place in the fridge for 15 minutes.

  • Fill each puff pastry center with dollops of goat cheese and top with crumbled prosciutto and/or bacon, making sure there is none on the border.


Bake for 8 minutes or until the border has puffed up. Press the center down gently with the back of a spoon. Break an egg into a small bowl then pour it into the center of the “plate”. Repeat for each egg. Season with salt and freshly ground pepper and sprinkle with the Parmesan cheese. Place them back into the oven for another 6-7 minutes until the whites of the eggs are set and the puff pastry is golden. Garnish with chopped parsley.

Lettuce Wraps with Pork, Cilantro, Crunchy Chow Mein Noodles, Peanuts & Sriracha


It was a typical summer in Japan, hot and humid with the occasional torrential downpour and thunderstorm. In an effort to save money on our bills, we played this silly game where we would see how far into the summer we could make it without turning on our air conditioner (once we made it until the beginning of August!) Absurd, yes, but there it is.

So our little Japanese apartment was obviously warm, but we had several fans going that made it bearable. I thought that lettuce wraps might be a good meal for a hot evening. I washed the lettuce leaves then got the “brilliant” idea (blame the heat?) to throw them in the freezer for a minute to keep them cold while we set the table. Ha. You know what happens when you put lettuce in the freezer? All the moisture in the leaves freezes almost immediately, and then when you take them out, they defrost immediately, leaving you with pathetic wilty leaves. Awesome. I can’t believe I just told that story. That night we enjoyed the lettuce wrap filling on its own, and I think I made some steamed rice to go with it. Needless to say, I never blogged about lettuce wraps. And we might have broken down and turned on the air conditioner.


This time around we were much more successful, and since we live in Santa Cruz and most houses don’t even have air conditioners, we’ll never play that ridiculous game again.  Leaves from a beautiful head of red leaf lettuce remained in the refrigerator until dinner time and were perfectly crisp and ready to be filled with seasoned pork, bright green cilantro, crunchy chow mein noodles (from a can, yes, but oh so good), peanuts, and plenty of Sriracha to spice it all up.


Lettuce Wraps with Pork, Cilantro, Crunchy Chow Mein Noodles, Peanuts & Sriracha

1/2 TBS. canola oil
1/2 TBS. sesame oil
1 lb. ground pork
1 TBS. grated or minced ginger
1 TBS. minced garlic
2 green onions, diced
2 TBS. soy sauce
1 TBS. mirin
1 TBS. rice vinegar
1/2 TBS. oyster sauce*
1 small spoonful of peanut butter
2 tsp. agave nectar
1 head of red leaf lettuce, leaves separated, washed and dried
Cilantro leaves
Crunchy Chow Mein Noodles, such as La Choy
Roasted, salted peanuts
Sriracha

*This can be omitted if you don’t have it on hand – we used it to add a little thickness and saltiness to the sauce

  • Add the canola oil and sesame oil to a large skillet and heat over medium high heat. Add the ground pork and cook until no longer pink, using a wooden spoon to break up the meat. If there is any fat, drain with a spoon. Return skillet to medium heat. Add the garlic, ginger and cook for several minutes, stirring frequently. Add the green onions and stir to combine.
  • In a small bowl, whisk together the soy sauce, mirin, rice vinegar, oyster sauce, peanut butter, and agave nectar. Taste and adjust ingredients as necessary. These lettuce wraps are very adaptable to your tastes!
  • Add the sauce to the pork mixture and cook over medium high heat, stirring, until it reduces slightly and incorporates into the meat.
  • Transfer the pork mixture to a serving bowl. Place your lettuce leaves on a serving platter. Put the cilantro, chow mein noodles, and peanuts in little bowls and place everything on the table for everyone to serve themselves. Don’t forget the bottle of Sriracha!

To go with our lettuce wraps, I used a vegetable peeler to make shavings of daikon (Japanese white radish) and carrot, tossed with a little sesame oil, rice wine vinegar, sugar & salt to taste, and a sprinkling of black sesame seeds.

Blueberry Cupcakes with Brown Sugar Cream Cheese Frosting


I have a 2 year old! Saturday’s weather was sunny and warm, perfect for Levi’s birthday BBQ at the park. He ran around, he played with sticks in the dirt, he colored on butcher paper with crayons, he blew bubbles, and he devoured chips and salsa, a grilled sausage (bockwurst is his personal favorite) on a sesame challah roll with arugula and sweet mustard, baked beans (his Uncle Lars’s contribution to the party – thank you!), potato salad with spring vegetables and mustard vinaigrette, and of course, his special birthday cupcake. Like most 2 year olds I know, Levi can really power through the blueberries; they are his favorite snack, so I knew that blueberry cupcakes were in order for his birthday celebration.


I came across a recipe on Smitten Kitchen for peach cupcakes with a brown sugar-cream cheese frosting. I simply swapped the peaches for blueberries and had the blueberry cupcake I was envisioning. The brown sugar in the frosting really sets it apart from regular cream cheese frosting. I know that Levi approved when I saw the look on his face when he licked the beater 🙂

I topped the cupcakes with a mint leaf (our plant in the backyard is flourishing!) and, of course, a blueberry. Then I packed them into  my handy new 36-cupcake carrier, where they arrived at the park in perfect shape, ready to be devoured and washed down (by the adults) with some Pale Ale and Amber Ale from Santa Cruz Mountain Brewing.


See that ice in the bottom tray of my cupcake carrier? When I read that the mercury was going to hit the 80s on the day of Levi’s party (what a relief, since last year the cake time at his 1st birthday party was cut short due to drizzle!), I filled some of the cups in the bottom tray with water and stuck it in the freezer (a tip that I read in one of the Amazon reviews). It seemed to help because despite the heat, the frosting didn’t melt! Of course, I kept the carrier in the shade as well.


He was one happy birthday boy. Happy birthday, dear Levi, happy birthday to you! And let’s hope Mommy and Daddy survive the terrible 2s!


Blueberry Cupcakes

(Slightly adapted from the peach cupcakes with brown sugar cream cheese frosting on Smitten Kitchen; makes 24 cupcakes)

3 cups cake flour
1 1/2 teaspoons baking powder
1 1/2 teaspoons baking soda
1 teaspoon salt
Pinch of nutmeg
3/4 cup (1 1/2 sticks or 6 ounces) unsalted butter, at room temperature
3/4 cup granulated sugar
3/4 cup dark or light brown sugar, packed
2 large eggs, lightly beaten
1 teaspoon vanilla extract
1 1/2 cups (12 ounces) buttermilk, sour cream or full-fat yogurt
3 4.4-ounce containers of organic blueberries, washed and dried (set aside 24 blueberries for decorating the tops of the cupcakes)
24 fresh mint leaves

  • Preheat the oven to 350°F. Line 24 muffin cups with paper liners.
  • Sift together the flour, baking powder, baking soda, salt and nutmeg and set aside.
  • Cream the butter and sugars together, beating until fluffy. Add the eggs, one at a time, scraping down the sides and bottom of the bowl between each addition, and then add the vanilla. Gently mix in the buttermilk, sour cream or yogurt. Stir in the dry ingredients and fold in the blueberries.
  • Divide the batter evenly among the prepared cupcake liners. Bake for 18 to 22 minutes, or until a tester inserted into the center of cupcakes comes out clean. Cool the cupcakes for five minutes in the tin, then turn them out onto a wire rack to cool completely.

Brown Sugar Cream Cheese Frosting

1 1/4 cups light brown sugar
1/4 cup cornstarch
1/2 cup powdered sugar
2 8-ounce packages of cream cheese, at room temperature
1/2 cup (4 ounces or 8 tablespoons) butter, at room temperature
1/2 teaspoon vanilla extract

  • In a small bowl, whisk together the brown sugar, cornstarch and powdered sugar.
  • In a large bowl, beat the cream cheese and butter until fluffy. Add the sugar-cornstarch mixture and vanilla, beat until frosting is smooth and light. Chill the bowl in the refrigerator until it thickens back up a bit, about 30 minutes, then spread or dollop on cooled cupcakes. Decorate with a mint leaf and a blueberry, if desired.

Sake-Steamed Clams with Sriracha Compound Butter


Seafood and I have come a long way. As a child and into my teenage years, I generally avoided it (except for the occasional tempura shrimp or in “fish and chip” form). Then when I was in college, I had several seafood dishes that expanded my horizons and changed my attitude towards things of the sea. One of them was the Garlic Baked Clams at Brophy Bros. Restaurant & Clam Bar, out on the Santa Barbara wharf.  Over glasses of white wine, my friend Lauren and I enjoyed this irresistible appetizer with a basket of sourdough bread one evening towards the end of our college careers. It was official – I was a clam convert.

So, last weekend on a blustery, rainy evening, the girl who used to avoid seafood was craving a big pot of steamed clams, with some crusty bread, and two of our best friends. There were a lot of clams, 7 lbs in fact, but we made short work of them. They were steamed in sake, topped with a Sriracha compound butter, a dash of togarashi (a Japanese spice blend of cayenne, orange peel, sesame seeds, and seaweed), and a scattering of scallions. We soaked up the flavorful broth, now enriched by the melted Sriracha butter, with a Gayle’s Capitola Sourdough baguette. It was a heavenly meal.


The original recipe calls for plain, unsalted butter that you put on top of the hot clams, but the idea of a Sriracha butter entered my brain (these are the friends with whom we do our “Sriracha Dinners” – if you remember such meals as the Ultimate Sriracha Burger, Camarones a la Diabla, or Miso-Sriracha Glazed Salmon with Spicy Slaw). It seemed right to continue the tradition, and we thought the Sriracha compound butter (recipe from The Sriracha Cookbook) added a little extra zip to the clams and a depth of flavor once it melted and incorporated into the broth. It was also pretty amazing spread on the sourdough bread 🙂

The recipe below serves 4 as a main dish.


Sake-Steamed Clams with Sriracha Compound Butter

(Slightly adapted from Food & Wine; recipe contributed by Nobuo Fukuda)

4 TBS. butter (1/2 a stick), at room temperature*
1 TBS. Sriracha
1 small garlic clove, minced
Salt
7 lbs. Manila clams, scrubbed
3 1/2 cups Sake (roughly 1-750 ml bottle)**
3 1/2 cups water
2 scallions, white and light green parts only, thinly sliced
a couple pinches of togarashi

* If you find yourself with leftover Sriracha compound butter, try using it to cook your fried eggs in the morning (yum), spread it on a bagel, top grilled steak or fish, or melt and drizzle onto popcorn. You really can’t go wrong.

** Chef Fukuda suggests using a cooking sake, or ryori, such as Shochikubai brand. We used a Gekkeikan sake from Trader Joe’s – just make sure whatever you choose is a dry sake.

  • Fill a medium bowl with cold water and add 1 tablespoon of salt. Add the clams and let stand for 1 hour. Drain the clams and rinse them well.
  • Meanwhile, make the Sriracha compound butter: Using a wooden spoon, mix the butter with the Sriracha and garlic until evenly incorporated. Scrape the butter out onto a large sheet of plastic wrap. Using the plastic wrap as a barrier between your hands and the butter, form the butter into a log shape, about 1 inch in diameter. Roll the butter up tightly, adjusting and maintaining the log form. Refrigerate for at least an hour to allow the butter to set up and the flavors to meld.
  • In a large, deep pot, combine the sake with the water and bring to a boil. Add the clams, cover the skillet tightly and cook, shaking the pan occasionally, until most of the clams have opened, about 4 minutes (ours took about twice as long to open, but maybe that’s because we were cooking 7 lbs instead of 2 lbs!)
  • Spoon the clams and broth into 4 bowls. Top  each bowl of clams with a slice of the Sriracha compound butter, garnish with the scallions and togarashi and serve immediately, along with sourdough bread to soak up the broth.

Columbia 1905 Salad


All that research about Cuban recipes for Krystal’s virtual baby shower paid off – I now have several mouth-watering recipes bookmarked from Saveur, one of my favorite food magazines/websites. Among magazines that focus on celebrity chefs and the newest burger trends, Saveur stands apart with its honest, down-to-earth, genuine celebration of different cultures, food, and the people who make it.

As I scrolled through my search results for “Cuban food,” I came across this salad called the “Columbia 1905,” which is from the blog Sticky Gooey Creamy Chewy. The salad originates from a Cuban restaurant in Florida named the Columbia and consists of crispy iceberg lettuce, julienned ham, Swiss cheese, pimento-stuffed green olives, grated Romano cheese, and a garlicky, lemony dressing. At the Columbia restaurant, tuxedo clad waiters toss the salad at your table, which I imagine adds a nice dramatic touch before digging into your first course.

We omitted the tomatoes because they’re not yet in season (though I long for them), added some diced green bell pepper because it sounded appealing, and the best thing (wait for it) – added some crumbed chorizo bacon from El Salchichero, sort of a play on a Cuban-style club sandwich, er, salad. And while it’s not the lowest sodium dish in the world, this flavorful salad with Cuban flair is substantial enough to be a dinner on its own, and special enough to be served for dinner guests. You might want to keep this recipe in mind in a couple weeks when you’re looking for new ways to use up leftover Easter ham!

And you know those Garlic Knots I just posted? They would be an awesome accompaniment to this salad!


Columbia 1905 Salad

(Just slightly adapted from Sticky Gooey Creamy Chewy, as seen on Saveur.com)

For the Salad:

4 cups iceberg lettuce, chopped
1/2 a large green bell pepper, diced
1/2 cup ham, julienned
1/2 cup Swiss cheese, julienned
1/2 cup pimiento-stuffed green Spanish olives, sliced
2 cups “1905” Dressing (see recipe below)
1/2 cup Romano cheese, grated
1 tsp. – 1 TBS. Worcestershire sauce, according to your taste (we used 1 TBS.)
1-2 TBS. fresh lemon juice, according to your taste (we used 1/2 a lemon)
2 strips of chorizo bacon (or regular bacon if you don’t live near El Salchichero), cooked and crumbled

For the “1905” Dressing:

1/2 cup extra-virgin olive oil
4 garlic cloves, minced
2 tsp. dried oregano
2 TBS. cup white wine vinegar
Salt and pepper to taste

  • To make the dressing, combine the olive oil, garlic, and oregano in a small bowl and mix with a whisk. Gradually add the vinegar, beating to form an emulsion. Season with salt and pepper to taste. (For best results, prepare 1 to 2 days in advance and refrigerate).
  • Combine lettuce, peppers, ham, Swiss cheese, and olives in a large salad bowl. Before serving, add “1905” Dressing, Romano cheese, Worcestershire, and the fresh lemon juice. Toss well, top with crumbled chorizo bacon, and serve immediately. Serves 2 as a main course or 4 as a side salad.

Soft Garlic Knots


During our college days in Santa Barbara, there was an Italian restaurant called Palazzio that was a popular place for freshman to go out to eat with their parents when they were in town. Parents must have liked it because of the self-serve wine casks on the restaurant walls (regulated by the honor system). I know the students liked the complimentary soft, buttery, garlicky rolls that appeared at your table soon after ordering. I loved those rolls. It was a challenge to not fill up on them before your pasta arrived. I always wondered if Palazzio was scheming to make sure we all gained the “freshman-15.”

I ate at Palazzio with Dustin and his mom when we were newly dating freshman year. It was the “meet my mom” dinner. He was nervous and dropped one of those buttery, garlicky rolls on my red suede pants (yes, I wrote red suede pants; and I rocked them). I’m not sure that stain ever came out (not that they fit me anymore so it’s a moot point), but I eventually married Dustin, so I obviously put the roll incident behind me.

I made these Soft Garlic Knots for another recipe swap. The theme this time was “Secret Recipe Club” – a popular food blogging event where you are randomly assigned someone’s blog, and you can choose which recipe you want to make and blog about. The flexibility appealed to me, so I decided to join in. I was assigned Simple Gourmet Cooking. I spent a good day or so looking through all of Dawn’s recipes. Choosing was overwhelming at first! I wanted to choose something that was a favorite in Dawn’s household so decided to narrow my search down to her “favorite posts of 2011.” When I saw the Soft Garlic Knots on this list, they immediately reminded me of my college days, Palazzio, and the first time I met my future mother-in-law. I knew this was the recipe I was going to make. I also wanted to expand my yeast-bread horizons. It’s always good to challenge yourself in the kitchen!

I’m so glad I did. These garlic knots were easy to make and shape (even with kneading the dough by hand since I don’t have a stand-mixer). And the garlicky-buttery glaze that you brush over the tops is just what they need to go from ordinary dinner roll to over-the-top dinner roll. I took Dawn’s advice and brushed the knots with even more glaze before serving. It’s hard to go wrong with more butter. Dustin, Levi, and I devoured them with our bowls of soup, and you’ll be happy to know that no one dropped a garlic knot on anyone’s lap.

Soft Garlic Knots

(Just slightly adapted from Simple Gourmet Cooking, as seen on Annie’s Eats and Amber’s Delectable Delights, originally from King Arthur Flour)

For the Dough:

3 cups bread flour
1 TBS. sugar
2 tsp. instant yeast*
1 1/4 tsp. salt
2 TBS. olive oil
1/4 cup milk
1 cup plus 2 TBS. lukewarm water

*I used active dry yeast and proofed it in the 2 TBS. lukewarm water before adding it to the dry ingredients.

For the Glaze:

2 cloves garlic
3 TBS. melted butter
1/2 tsp. Italian seasoning*

* I used a combination of things I had on hand – some dried oregano, chopped fresh rosemary, and crushed red pepper flakes. Not quite Italian seasoning, but it didn’t seem to matter much in the end.

Combine the dry ingredients in a stand mixer fitted with the paddle attachment.  Add the olive oil, milk and water.  Mix until ingredients have formed a dough (alternatively you can use a hand-mixer as I did).   Switch to the dough hook and knead on low speed until the dough is smooth and elastic, about 8 minutes (I used my hands to achieve this). Transfer the dough to a lightly oiled bowl, turn once to coat, and cover with plastic wrap. Allow to rise for about 1 hour, or until doubled in bulk.

Divide the dough into 10 equal pieces.


Roll each piece into a 10-inch long rope.


Tie the rope into a knot.


Take the end lying underneath the knot and bring it over the top, tucking it into the center.


Take the end lying over the knot and tuck it underneath and into the center.


Transfer shaped rolls to a baking sheet lined with parchment paper. Cover with a clean kitchen towel and let rise for 45 minutes, until puffy.

To make the garlic butter, finely mince the garlic and mix with the melted butter and Italian seasoning.


Preheat the oven to 350° F.  Brush the glaze onto the shaped rolls, reserving a little to brush on after baking, if desired.  Bake until set and lightly browned, about 15-18 minutes.  Let cool slightly before serving. Brush with more glaze.

If you want to freeze the garlic knots, slightly under-bake them (about 12-15 minutes), allow to cool completely, and store in a freezer bag.  Bake frozen garlic knots as listed in the instructions above, approximately 15 minutes, until heated through.  Brush with glaze.

Chewy Chocolate Chunk Cookies


I grew up eating a crisp oatmeal chocolate chip cookie that I still turn to when I’m having a cookie craving, but I do love a soft, bakery-style cookie once in a while and have been meaning to try a recipe at home with my little assistant, who (at almost 2 years old!) is now old enough to “help” me. On a rainy Wednesday, Levi and I made a batch of these together – him perched on a kitchen stool; me on my own two feet.

He got really excited when I retrieved the hand-mixer from the baking drawer, and imitated the sound while doing his own little mixer charade. He also does a perfect imitation of the sound of an egg cracking on the counter. When I spooned the flour into a measuring cup, he helped me level it off with a knife then dump it into the bowl. What a good helper. After much measuring, mixing and scooping, the cookies were in the oven and there was flour everywhere, even on the tip of Levi’s little nose. We both peered through the little oven window and exchanged looks of anticipation and delight.

My little assistant, wearing my apron (which he insisted upon). He was so excited, he couldn’t keep his face still, hence the blur!

These cookies were just what I was craving – sweet with a hint of salt for balance, slightly crisp on the exterior with a chewy inside, and a gooey dark chocolate chunk in every bite. I found the recipe on Kelsey’s blog Apple a Day – thanks for a recipe that I’ll surely return to again and again. My only adaptations were using 3 tablespoons of olive oil because I was short 3 tablespoons of butter (which I wasn’t sure about but you couldn’t even tell in the end!), using salted butter and reducing the amount of salt in the recipe to just over a 1/4 tsp., and using chopped semisweet dark chocolate in place of chocolate chips.


Chewy Chocolate Chunk Cookies

(Just slightly adapted from Apple a Day; originally from Food Network Canada)

3/4 cup salted butter, softened 
3/4 cup brown sugar 
1/4 cup granulated sugar 
1 egg 
2 tsp. vanilla extract 
2 cups all-purpose flour 
2 tsp. cornstarch 
1 tsp. baking soda 
1/4 tsp. salt 
1 cup chopped good-quality semisweet dark chocolate, such as Scharffenberger
  • Preheat oven to 350 degrees F.
  • In a large bowl, using a hand-mixer, cream together butter and sugars until light and fluffy. Add egg and vanilla and mix until blended. Add flour, cornstarch, baking soda and salt and mix until flour is incorporated. Stir in chocolate chunks.
  • Drop tablespoons of dough onto a baking sheet lined with parchment paper.  Bake for 8-10 minutes, until barely golden brown around the edges.  (It actually took my cookies/oven about 11 minutes to achieve that ‘barely golden brown’ – also note, the tops will not brown so don’t overcook them!)
  • Let cool on the baking sheet on a wire rack for five minutes.  Remove cookies from baking sheet and let cool completely.  Makes approximately 3 dozen, which may sound like a lot, but trust me – they’ll go fast!

Frita Cubana Sliders (for Krystal’s Virtual Baby Shower!)


When I first started this blog back in 2007, I wanted to archive the recipes that we threw together on a weeknight in our little Japanese kitchen. I never gave much thought to the people actually reading it, except maybe close friends and family. But then something happened over the next year or two – I discovered a community of people who also love to take pictures of their food and write about it, and a handful have become good friends.

Although I’ve never met any of these ladies in person (yet!) I feel like I know them, which is a pretty cool thing. Take Krystal for example, of Mrs. Regueiro’s Plate. We were first “introduced” on a recipe board where we both are frequent posters. When I was assigned her thin-crust pizza for an Italian-themed recipe swap, we were able to talk more about our experiences in Italy. Through comments back and forth on our blogs, it’s pretty safe to say that this Santa Cruz girl and LA girl would get along quite well. Guess what? Krystal and her husband Eric are expecting their first child in May (gender is a surprise – I love that!)

To celebrate this exciting time in their lives, Joelen of What’s Cookin’ Chicago is hosting this virtual baby shower, and I’m so excited to be a part of it. In honor of Krystal’s Filipino background and Eric’s Cuban background, Joelen asked some of Krystal’s favorite bloggers to prepare either a Filipino or Cuban dish for a baby shower fiesta.

Excited to try a new type of cuisine, I spent an afternoon doing some research.  I found myself leaning towards a Cuban dish because I was intrigued by the flavors and knew the least about the culture. I came across several recipes for a Frita Cubana – or Cuban Hamburger – and was drawn to the concept. A beef & chorizo patty is topped with a liberal handful of fried shoestring potatoes, and a generous amount of sweet & vinegary spiced ketchup. Festive, flavorful, and undeniably Cuban, I decided this was going to be my shower offering! Krystal, these sliders are fun and will add a little spice to the party – just like you! I wish you the best as you get ready to welcome your little one into the world!

To accompany your frita cubana sliders, I made a refreshing salad of fresh, chopped romaine, crunchy jicama, sweet orange, and cool avocado.


Visit the full roundup here! Krystal & Eric’s Baby Shower Fiesta!

Frita Cubana Sliders

(makes 12-16 sliders – slightly adapted form Saveur)

1 lb. ground beef
1/2 lb. Spanish chorizo, casings removed
1/2 cup crushed saltine crackers (about 10)
2 TBS. finely chopped yellow onion
1 tsp. smoked Spanish paprika
2 garlic cloves, finely chopped
Freshly ground black pepper
Kosher salt
Canola oil, for frying
2 large russet potatoes, peeled
soft slider rolls, split in half
Secret Sauce (recipe below)

  • In a large bowl, combine the ground beef, chorizo, crushed crackers, onions, paprika, garlic, salt, and pepper; Using your hands, mix everything together until just combined. Cover with plastic wrap; refrigerate for 30 minutes. Form into slider-sized round, thin, patties.
  • Pour oil into a 4-qt. saucepan until it reaches a depth of 2 inches. Heat over medium-high heat until a deep-fry thermometer registers 330°. Meanwhile, working over a large bowl, grate potato using the large-holed side of a box grater. Soak grated potatoes in water for 1 minute and drain. Spread potatoes on a kitchen towel and pat dry. Working in batches, fry potatoes until golden brown, about 2 minutes. Using a slotted spoon, transfer potatoes to paper towels and season lightly with salt; set aside.
  • Prepare a charcoal grill. Grill the patties until cooked through and nicely browned. Spread some secret sauce on each slider bun, and place the patties on top. Top with a generous mound of fried potatoes. Drizzle with more sauce.


Secret Sauce for a Frita Cubana

(from 3 Guys from Miami)

1 (6-ounce) can tomato paste
1 1/2 cups water
1 teaspoon ground cumin
1 1/2 teaspoons sweet Spanish paprika
1 teaspoon garlic powder
1/4 cup sugar
1/4 cup white vinegar
1 teaspoon salt

  • Mix all of the ingredients together in a two-quart saucepan. Bring to a boil, stirring constantly. Reduce heat to low and simmer, stirring occasionally, for 10 to 15 minutes or until slightly thickened. Remove from heat and let cool. Use generously on your frita cubana sliders!